Are you ready to join the long line of artists who have worked with photograms, from Man Ray and Pablo Picasso to Imogene Cunningham? The magical ingredient in this month’s box is Purple Solarfast™ Dye, which can be used to create photograms of all types, from continuous tone images and detailed photographs to shadow prints and ombrés. Not sure what those are? Never fear, this short blog post is designed to set you on the right track, and includes explanations, project suggestions, and more! The basic technique is simple. From there, you’ll be able to experiment with different methods, refine your style, and observe improvement. But one of our favorite features of the photogram is the immediacy of the end result: the image you make will transform before your eyes. Plus, the sky’s the limit for what you can do in terms of design and media, from clothing to wall art, and so much more. Let’s get started!
What is a Photogram Again?
For you go-getting artists who read our previous blog post, you might remember that a photogram is a photographic image made without a camera: objects are placed directly onto the surface of a light sensitive material (i.e. photographic paper or your Solarfast™ Dye) and exposed to light. A negative shadow image results, in tones that depend on the transparency of the objects used. (So basically the coolest thing ever!) Photograms have been around for roughly two centuries, before glass plate and film photography and long before today’s digital camera age. Throughout this time, they have fostered and documented scientific inquiries, led to technological discoveries, and shaped artistic movements. How will you add your creative mark to this history?
Always Start with your Solarfast™ Dye
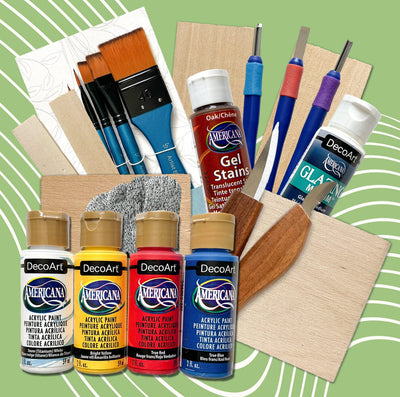
Whatever type of artwork you choose to make, your Solarfast™ Dye is the key to making it happen. Simply put, it is the light sensitive element that will help your image appear. It develops color when exposed to sunlight (UV). Just apply it to your surface (this can be paper, fabric or wood, for example) with a brush, sponge or brayer. Why not use one of the royal brush wood handle foam brushes that came in this month’s box? Make sure to blot the surface so that it’s not too wet but still damp. While damp, expose your design to sunlight and watch the color magically appear! (You can also develop your image with artificial light, but exposure time depends on the UV output of the bulb.)
Get Creative and Remember your Art History: Find Solid Objects To Make Unique Patterns on your Print!
Begin by finding non-translucent objects that cast dark shadows. This is the moment to let your creative side shine – all sorts of objects can create interesting and eye-pleasing shapes and patterns, from safety pins, leaves, feather, keys, paper cutouts, and lace doilies to clothing. Ideas can come from anywhere – a room in your home, a box of old memories, the shopping mall, or outside in your garden. Remember, flat objects make crisper edges than three-dimensional ones. So if you’re working with leaves and flowers, for instance, flatten them overnight in a book. When you’ve chosen your object(s), place them directly on top of your Solarfast™ Dye coated paper in whatever pattern you would like (we recommend heavy artist paper or watercolor paper)!
Next, take your paper outside to expose in the sun. Exposure times vary depending on color and weather conditions, but we recommend 10 to 20 minutes in the middle of the day. After exposing, return inside and watch your image appear! Wash off any undeveloped dye by pouring a capful of Solarfast™ Wash into a basin, and fill it with hot water. This also helps preserve the white areas and highlights. Keep the water running and shake the basin until all undeveloped dye is removed. This should take about 10 minutes.
While you’re marveling at your amazing art abilities, it might entertain you to know that you just undertook a historic art technique. In 1843, the English politician and polymath William Henry Fox Talbot (1800-1877) was one of the first to discover the method, which he called photogenic drawing: he placed leaves and other botanical specimens onto sensitized papers, and left them outdoors under the sun to expose. Anna Atkins (1799-1871) next created the first book illustrated with photographs (British Algae: Cyanotype Impressions), photograms of botanical specimens, which were made with Sir John Herschel’s (1792-1871) cyanotype process, a cameraless technique that produces blue pictures. Does it look familiar? It was the forerunner of the blueprint!
Keep Experimenting with your Choice of Objects and Design: Shadow Prints and Ombré
Next, why not try this process with a 3-dimensional object so you’ll get more tonal nuance in your resulting image? Or even attempt an ombré design: ombré describes a gradual shift in hue (picture a rainbow), which is obtained by choosing objects with a range of translucencies.
Fabric-Based Projects for Fashion and Home Décor
This solar-printing process is so versatile, you can even apply it to all kinds of fabric, like cotton, linen, canvas, silk, and hemp! While paints and inks sit on top of the fabric surface, dyes become part of fabric for a more professional look and softer feel on the skin. Shall we try making a T-Shirt? Before applying your Solarfast™ Dye with your brush, put a divider in between the top and bottom T-Shirt layers to prevent bleed through. You’ll next follow the same steps as your above paper creation. But here, when it comes time to washing off the undeveloped dye, run your machine on the hottest cycle with your Solarfast™ Wash (this also reduces the risk of back staining during subsequent washes). If you don’t have a machine, you can still hand wash it for optimal results! And once you have mastered the T-Shirt, why not transform your entire wardrobe? Trust us, you will want to! This same process can be used to make scarves, leggings, tote bags, or an elegant pochette for your next soirée…
Keep Experimenting with Fabric-Based Methods: Tie-Dye and Batik!
There are even more ways of using your Solarfast™ Dye to create lovely designs on fabrics. Many of these are resist-dye methods. That is, they resist or prevent the dye from reaching all of the cloth, in order to create a pattern. This can be done simply by strategically folding the fabric to create a design, or by trying your hand at time-honored textile methods such as tie-dye or batik.
Tie-Dye became popular in the USA through the 1960s Hippy Movement, but it was actually an ancient resist-dye technique used especially in Japan, India and West Africa to produce a massive range of eye-popping designs. The technique consists of folding, twisting and pleating your fabric and binding it with string or rubber bands before the application of your Solarfast™ Dye, and the above steps of exposure and fabric wash.
Batik is another resist-dye method, but this time through the use of wax. Here, you block out your chosen areas of cloth by brushing or drawing hot wax over them. The wax resists dyes, allowing you to color selectively by soaking the cloth in dye, removing the wax with boiling water, and repeating for successive colors. For you beginner batik dyers, we recommend using a wax crayon. You simply draw your pattern on fabric, trace over it with your crayon, and brush on your Solarfast™ Dye before exposure and wash as above. The batik tradition is found in various cultures, including Indonesia, Malaysia, Singapore, India, Bangladesh, Sri Lanka, Philippines and Nigeria. The Indonesian Island Java is particularly known for its vibrant paisley floral patterns – why not try imitating these?
Still Haven’t Found your Favorite Medium and Method? Why not Experiment with Stamping and Wood?
Solarfast™ Dye can also be applied directly to fabrics, paper, or your chosen surface medium. You can make your own rubber stamps (by following some easy directions such as these: https://dearhandmadelife.com/how-to-make-a-diy-carved-rubber-stamp/) Or scour your local or online thrift shop for beautiful antique stamps to use! Once you have your stamp all ready, brush your dye carefully over every portion of its surface and apply to your fabric or paper following your design, or at random!
And if you’ve grown tired of fabric and paper, why not reach into your box for your Ampersand Artist Panel Unprimed Basswood? This is another fantastic medium for using Solarfast™ Dye, especially if you are going for a clean, professional look. If you decide to save this for a later art project, you can use it for all types of painting grounds, and encaustic, mixed media, collage and wood engraving. The wood is already sanded and ultra-smooth, but remember to seal and prime it prior to use.
Want that Sleek Photographic Look for Your Next Poster or T-Shirt? Making Photographic Negatives is Simple too!
Many of the previous methods work best for getting single tone image results. In contrast, a continuous tone image is one in which each color at any point in the image is reproduced as a single tone, not as halftones (one single color for monochromatic prints or a combination of halftones for color prints for instance). A detailed photograph is just one example. Shall we try making another T-Shirt, this time using a photographic print?
Photographs should be black and white, inverted and printed on Solarfast™ Film on an inkjet printer. The resulting negative must be completely opaque in its darkest settings. Jacquard has made this process super easy: just visit http://www.jacquardsolarfast.com/ to rapidly transform any image into a negative!
As above, put a divider in between T-Shirt layers to prevent bleed through, before applying your Solarfast™ Dye using your brush. Apply the dye in the same shape as your negative, and, to obtain sharper edges, use masking tape to block off a window the size of your image (make sure to secure the tape firmly to our fabric so the dye doesn’t seep under) After you’ve blotted your fabric, place the film negative on the square of applied dye. Secure your image with a piece of glass, making sure it is flush with the fabric (we recommend clipping it to the glass!). Then expose as usual! Return indoors before removing your glass and negative, and washing off that undeveloped dye.
And if you don’t feel like printing out photographs, you can simply draw or paint directly onto your Solarfast™ Film with any opaque ink or paint. This is one reason we included a handy Jacquard Film Marker in this month’s box! It’s a completely opaque, fast drying, and non-toxic resist pen that is perfect for marking film media. Now is the time to really explore different design aesthetics: you can use and mix designs with text, for instance. Do you feel like channeling Jackson Pollack with an abstract expressionistic picture or a figurative, realist scene? The sky is the limit. When you’re happy with your design, apply your dye and expose as usual. You’re surely an expert by now!
And once you’ve mastered the basic techniques, why not experiment with multiple colors? Solarfast™ Dye also comes in golden yellow, orange, burnt orange, scarlet, red, violet, purple, blue, teal, green, avocado, sepia, brown and black.
Share your work on Social Media!
You have one final job: take a photo of your work with the hashtag #smartartbox so all of us get to ooh and aah over your talents! Come on, you deserve some flattery! If you have any questions or comments, join the conversation with other SmartArtBox artists on Twitter, Instagram, Facebook, or Pintarest – we’d love to hear from you!
Image sources
- Man Ray, Untitled, Rayograph, 1922 © Man Ray Trust / ADAGP
- Willie Ann Wright, Child’s Half Dress with Brugmansia Blooms. Source: http://willieannewright.com/Photograms
- Source: www.marthastewart.com
- Source: www.sweetpaulmag.com
- William Henry Fox Talbot, Photogenic Drawing of A Plant, c. 1835-45, Iris and B. Gerald Cantor Center for Visual Arts at Stanford University, Source: Wikimedia Commons
- Anna Atkins, Cystoseira granulata, cyanotype photogram, c. 1843-53, Photographs of British Algae: Cyanotype Impressions, Source: Wikimedia Commons
- Photo Source: http://www.inkodye.com/ideas/3162
- Source: www.thespruce.com
- Source:www.worldcraft.info
- Source: Pinterest
- Source: www.sashe.sk
- Source: YouTube.com


